-
General
-
Releases
-
Base Connector
-
- Beginner's Guide
- Overview
- Stations
- Datamaps
- Importing templates
- Formats
- Setting conditions
- Placeholders
- Job filter function
- How to create backups
- Running and Monitoring Jobs
- Export Job Automation
- Import/Export & copy of data map rows
- Synchronizing references that are not contained in views
- Get the preconfigured "Source data set - Template"
- Configuring categories and products
- Channel/View Tree Maintenance Active Job
- Configuring the price & stock modules
- Configuring the price/stock value ranges
- Configuring volume discounts/scale prices
- How to export prices
- How to export stock values from certain storage units
- Use of Contentserv Credentials
- Connector & Station User Limitation
- SC::Dynamic Image Crop Preset
- Todos
- Show all articles ( 11 ) Collapse Articles
-
- Price Table
- Stock Table
- Sales Channel Table
- Complex Article Table
- Importing data into SAWS tables (price, stock, etc.)
- SAWSConnector Usages
- Variant Articles
- Assignment of articles to complex articles
- Searching for SC::Prices / SC::Stocks
- Searching for SC::Channels
- Setup a transformation list for CSTypes
- Context-Sensitive Product Value Export
-
- Working with placeholder in conditions
- Improve usability of SC::Tables
- Placeholder for SC::Price, SC::Channel, SC::Stock
- REST Service API for SAWS Tables (Prices, Stock, Channels & Complex Articles)
- Dataflow import of SC::Tables
- Dataflow export of SC::Tables
- The datamap summary - Creating an automated documentation
- Export images as a ZIP file
- Image export with direct access to the CONTENTSERV platform
- Image export with no access to the CONTENTSERV platform
- Image export from a third party system
- How to configure CS Dashboard
- Setup a transformation list for CSTypes
- FAQ
- Export Smart Document via Active Script and assign output to product
- Format Macros
- Controlling Connector Jobs via the REST API
- Sales Channel Maintenance via Excel Cross-Reference
- Sales Channel Inheritance Active Job
- Job Parameters & Context Parameters
- Logbook
- Fill complex article tables automatically
- Datamap Mapping Status
- Show all articles ( 8 ) Collapse Articles
-
-
- Send value of a PIM reference
- Loop values for CS PIM references
- Send value of a MAM reference
- Loop values for CS MAM references
- Send value of a Channel (view) reference
- Loop values for CS Channel (Views) references
- Send value of an attribute reference
- Send value of a user reference
- Loop values for user references
- Send value of a reference (deprecated)
- Merge reference values format plugin
- Search for usage of item
- Search for item IDs using attribute data
-
- Loop Head and Loop Value
- Loop values for several attributes simultaneously
- Loop values for child elements
- Loop values for CS PIM references
- Loop values for CS Channel (Views) references
- Loop values for CS MAM references
- Loop values for user references
- Loop values for SC::Prices
- Loop values for SC::Stocktable entries
- Loop values for SC::Complex products
- Loop values for CS type reference
- Loop values for a CS table
- Loop value for simple data record
- Loop values for JSON Objects
- Loop for value range entries
-
- Create a JSON-String (create an array)
- Format value lists
- Tree paths or values from tree elements
- Multistep formatting
- Send accesslevel of the object
- Send value of a job parameter
- Search for values in several attributes
- Format with PHP Code (deprecated)
- Format Macros
- Load data via REST Service
- AI Value Transformation Format
- AI Value Translation Format
- Store value into a Contentserv Item
- Execute a conditional format (switch-case) Format Plugin
- Load array value from the Contentserv getValues Format Plugin
- Process HTML table Format Plugin
- Replace via regex pattern format plugin
- Convert value ranges into each other
- Merge Array Format Plugin
- Export several attributes simultaneously
- Show all articles ( 5 ) Collapse Articles
-
Owl Cloud Services
-
Owl Data Hub
-
Ursula AI
- Ursula AI
- Supported AIs
- AI Value Transformation Format
- AI Value Translation Format
- Generate Descriptions with Ursula AI Active Job
- Populate Attributes via Ursula AI Active Job
- AI Product Tree Organizer Active Job
- Mapping Sales Channels via the Ursula AI Active Job
- Store value into a Contentserv Item
-
GenericJSON / DynamicJSON Connector
-
- SAWSConnector settings
- Categories
- Products
- Product-Category assignment
- Export von Feldkonfigurationen/Attribute/Wertelisten
- Finish the export
- Response log
- Sample JSONs
- SQL Transmitter
- Shopify Transmitter
- Base. (Baselinker) Transmitter
- PlentyONE Transmitter
- Building JSON Target Keys
- Default HTTP Transmitter
- Configuratorware Transmitter
-
-
- Send value of a PIM reference
- Loop values for CS PIM references
- Send value of a Channel (view) reference
- Loop values for CS Channel (Views) references
- Send value of a MAM reference
- Loop values for CS MAM references
- Send value of an attribute reference
- Send value of a user reference
- Loop values for user references
- Send value of a reference (deprecated)
- Merge reference values format plugin
- Search for usage of item
- Search for item IDs using attribute data
-
- Loop Head and Loop Value
- Loop values for several attributes simultaneously
- Loop values for child elements
- Loop values for CS PIM references
- Loop values for CS Channel (Views) references
- Loop values for CS MAM references
- Loop values for user references
- Loop values for SC::Prices
- Loop values for SC::Stocktable entries
- Loop values for SC::Complex products
- Loop values for a CS table
- Loop values for CS type reference
- Loop value for simple data record
- Loop values for JSON Objects
- Loop for value range entries
-
- Create a JSON-String (create an array)
- Format value lists
- Tree paths or values from tree elements
- Multistep formatting
- Send accesslevel of the object
- Send value of a job parameter
- Search for values in several attributes
- Format with PHP Code (deprecated)
- Format Macros
- Load data via REST Service
- AI Value Transformation Format
- AI Value Translation Format
- Store value into a Contentserv Item
- Execute a conditional format (switch-case) Format Plugin
- Load array value from the Contentserv getValues Format Plugin
- Process HTML table Format Plugin
- Response Handler Field Plugin
- Replace via regex pattern format plugin
- Convert value ranges into each other
- Merge Array Format Plugin
- Export several attributes simultaneously
- Show all articles ( 6 ) Collapse Articles
-
GenericXML Connector
-
-
- Send value of a PIM reference
- Loop values for CS PIM references
- Send value of a Channel (view) reference
- Loop values for CS Channel (Views) references
- Send value of a MAM reference
- Loop values for CS MAM references
- Send value of an attribute reference
- Send value of a user reference
- Loop values for user references
- Send value of a reference (deprecated)
- Merge reference values format plugin
- Search for usage of item
- Search for item IDs using attribute data
-
- Loop Head and Loop Value
- Loop values for several attributes simultaneously
- Loop values for child elements
- Loop values for CS PIM references
- Loop values for CS Channel (Views) references
- Loop values for CS MAM references
- Loop values for user references
- Loop values for SC::Prices
- Loop values for SC::Stocktable entries
- Loop values for SC::Complex products
- Loop values for a CS table
- Loop values for CS type reference
- Loop value for simple data record
- Loop values for JSON Objects
- Loop for value range entries
-
- Create a JSON-String (create an array)
- Format value lists
- Tree paths or values from tree elements
- Multistep formatting
- Send accesslevel of the object
- Send value of a job parameter
- Search for values in several attributes
- Format with PHP Code (deprecated)
- Format Macros
- Load data via REST Service
- AI Value Transformation Format
- AI Value Translation Format
- Store value into a Contentserv Item
- Execute a conditional format (switch-case) Format Plugin
- Load array value from the Contentserv getValues Format Plugin
- Process HTML table Format Plugin
- Replace via regex pattern format plugin
- Convert value ranges into each other
- Merge Array Format Plugin
- Export several attributes simultaneously
- Show all articles ( 5 ) Collapse Articles
-
SimpleExcel Connector
-
-
- Send value of a PIM reference
- Loop values for CS PIM references
- Send value of a Channel (view) reference
- Loop values for CS Channel (Views) references
- Send value of a MAM reference
- Loop values for CS MAM references
- Send value of an attribute reference
- Send value of a user reference
- Loop values for user references
- Send value of a reference (deprecated)
- Merge reference values format plugin
- Search for usage of item
- Search for item IDs using attribute data
-
- Loop Head and Loop Value
- Loop values for several attributes simultaneously
- Loop values for child elements
- Loop values for CS PIM references
- Loop values for CS Channel (Views) references
- Loop values for CS MAM references
- Loop values for user references
- Loop values for SC::Prices
- Loop values for SC::Stocktable entries
- Loop values for SC::Complex products
- Loop values for a CS table
- Loop values for CS type reference
- Loop value for simple data record
- Loop values for JSON Objects
- Loop for value range entries
-
- Create a JSON-String (create an array)
- Format value lists
- Tree paths or values from tree elements
- Multistep formatting
- Send accesslevel of the object
- Send value of a job parameter
- Search for values in several attributes
- Format with PHP Code (deprecated)
- Format Macros
- Load data via REST Service
- AI Value Transformation Format
- AI Value Translation Format
- Store value into a Contentserv Item
- Execute a conditional format (switch-case) Format Plugin
- Load array value from the Contentserv getValues Format Plugin
- Process HTML table Format Plugin
- Replace via regex pattern format plugin
- Convert value ranges into each other
- Merge Array Format Plugin
- Export several attributes simultaneously
- Show all articles ( 5 ) Collapse Articles
-
Magento Connector
-
-
- Send value of a PIM reference
- Loop values for CS PIM references
- Send value of a Channel (view) reference
- Loop values for CS Channel (Views) references
- Send value of a MAM reference
- Loop values for CS MAM references
- Send value of an attribute reference
- Send value of a user reference
- Loop values for user references
- Send value of a reference (deprecated)
- Merge reference values format plugin
- Search for usage of item
- Search for item IDs using attribute data
-
- Loop Head and Loop Value
- Loop values for several attributes simultaneously
- Loop values for child elements
- Loop values for CS PIM references
- Loop values for CS Channel (Views) references
- Loop values for CS MAM references
- Loop values for user references
- Loop values for SC::Prices
- Loop values for SC::Stocktable entries
- Loop values for SC::Complex products
- Loop values for a CS table
- Loop values for CS type reference
- Loop value for simple data record
- Loop values for JSON Objects
- Loop for value range entries
-
- Create a JSON-String (create an array)
- Format value lists
- Tree paths or values from tree elements
- Multistep formatting
- Send accesslevel of the object
- Send value of a job parameter
- Search for values in several attributes
- Format with PHP Code (deprecated)
- Format Macros
- Load data via REST Service
- AI Value Transformation Format
- AI Value Translation Format
- Store value into a Contentserv Item
- Execute a conditional format (switch-case) Format Plugin
- Load array value from the Contentserv getValues Format Plugin
- Process HTML table Format Plugin
- Replace via regex pattern format plugin
- Convert value ranges into each other
- Merge Array Format Plugin
- Export several attributes simultaneously
- Show all articles ( 5 ) Collapse Articles
-
Shopware 5 Connector
-
- Configuration Shopware
- Configuration PIM
- Shopware attribute setting
- Configuration SAWSConnector
- Station configuration
- Source data set configuration
- Configuring categories and products
- Price table configuration for Shopware
- Result in Shopware
- Subshops and the SAWSConnector Shopware
- ean
- Custom Fields (attribute)
- highlight
- purchaseSteps
- stockMin
- supplierNumber
- notification
- shippingFree
- length
- height
- width
- weight
- shippingTime
- metaKeywords
- Show all articles ( 9 ) Collapse Articles
-
-
- Send value of a PIM reference
- Loop values for CS PIM references
- Send value of a Channel (view) reference
- Loop values for CS Channel (Views) references
- Send value of a MAM reference
- Loop values for CS MAM references
- Send value of an attribute reference
- Send value of a user reference
- Loop values for user references
- Send value of a reference (deprecated)
- Merge reference values format plugin
- Search for usage of item
- Search for item IDs using attribute data
-
- Loop Head and Loop Value
- Loop values for several attributes simultaneously
- Loop values for child elements
- Loop values for CS PIM references
- Loop values for CS Channel (Views) references
- Loop values for CS MAM references
- Loop values for user references
- Loop values for SC::Prices
- Loop values for SC::Stocktable entries
- Loop values for SC::Complex products
- Loop values for a CS table
- Loop values for CS type reference
- Loop value for simple data record
- Loop values for JSON Objects
- Loop for value range entries
-
- Create a JSON-String (create an array)
- Format value lists
- Tree paths or values from tree elements
- Multistep formatting
- Send accesslevel of the object
- Send value of a job parameter
- Search for values in several attributes
- Format with PHP Code (deprecated)
- Format Macros
- Load data via REST Service
- AI Value Transformation Format
- AI Value Translation Format
- Store value into a Contentserv Item
- Execute a conditional format (switch-case) Format Plugin
- Load array value from the Contentserv getValues Format Plugin
- Process HTML table Format Plugin
- Replace via regex pattern format plugin
- Convert value ranges into each other
- Merge Array Format Plugin
- Export several attributes simultaneously
- Show all articles ( 5 ) Collapse Articles
-
Shopware 6 Connector
-
- Tutorial Video
- Initial Connection & Authentication
- Import Shopware settings
- Export categories
- Export media files
- Export simple products
- Export multiple languages
- Export variant products
- Export product properties
- Export custom fields
- Export product cross-selling relationships
- Export prices
- Export stocks
- Export into any other Shopware field
- How to address multiple Shopware 6 websites
- How to address different Shopware 6 Sale-Channels from one Contentserv System
- Useful Links
- Sales Channel Maintenance via Excel Cross-Reference
- Show all articles ( 3 ) Collapse Articles
-
-
- Send value of a PIM reference
- Loop values for CS PIM references
- Send value of a MAM reference
- Loop values for CS MAM references
- Send value of a Channel (view) reference
- Loop values for CS Channel (Views) references
- Send value of an attribute reference
- Send value of a user reference
- Loop values for user references
- Send value of a reference (deprecated)
- Merge reference values format plugin
- Search for usage of item
- Search for item IDs using attribute data
-
- Loop Head and Loop Value
- Loop values for several attributes simultaneously
- Loop values for child elements
- Loop values for CS PIM references
- Loop values for CS Channel (Views) references
- Loop values for CS MAM references
- Loop values for user references
- Loop values for SC::Prices
- Loop values for SC::Stocktable entries
- Loop values for SC::Complex products
- Loop values for a CS table
- Loop values for CS type reference
- Loop value for simple data record
- Loop values for JSON Objects
- Loop for value range entries
-
- Create a JSON-String (create an array)
- Format value lists
- Tree paths or values from tree elements
- Multistep formatting
- Send accesslevel of the object
- Send value of a job parameter
- Search for values in several attributes
- Format with PHP Code (deprecated)
- Format Macros
- Load data via REST Service
- AI Value Transformation Format
- AI Value Translation Format
- Store value into a Contentserv Item
- Execute a conditional format (switch-case) Format Plugin
- Load array value from the Contentserv getValues Format Plugin
- Process HTML table Format Plugin
- Replace via regex pattern format plugin
- Convert value ranges into each other
- Merge Array Format Plugin
- Export several attributes simultaneously
- Show all articles ( 5 ) Collapse Articles
-
OXID Connector
-
-
- Send value of a PIM reference
- Loop values for CS PIM references
- Send value of a MAM reference
- Loop values for CS MAM references
- Send value of a Channel (view) reference
- Loop values for CS Channel (Views) references
- Send value of an attribute reference
- Send value of a user reference
- Loop values for user references
- Send value of a reference (deprecated)
- Merge reference values format plugin
- Search for usage of item
- Search for item IDs using attribute data
-
- Loop Head and Loop Value
- Loop values for several attributes simultaneously
- Loop values for child elements
- Loop values for CS PIM references
- Loop values for CS Channel (Views) references
- Loop values for CS MAM references
- Loop values for user references
- Loop values for SC::Prices
- Loop values for SC::Stocktable entries
- Loop values for SC::Complex products
- Loop values for a CS table
- Loop values for CS type reference
- Loop value for simple data record
- Loop values for JSON Objects
- Loop for value range entries
-
- Create a JSON-String (create an array)
- Format value lists
- Tree paths or values from tree elements
- Multistep formatting
- Send accesslevel of the object
- Send value of a job parameter
- Search for values in several attributes
- Format with PHP Code (deprecated)
- Format Macros
- Load data via REST Service
- AI Value Transformation Format
- AI Value Translation Format
- Store value into a Contentserv Item
- Execute a conditional format (switch-case) Format Plugin
- Load array value from the Contentserv getValues Format Plugin
- Process HTML table Format Plugin
- Replace via regex pattern format plugin
- Convert value ranges into each other
- Merge Array Format Plugin
- Export several attributes simultaneously
- Show all articles ( 5 ) Collapse Articles
-
Typo3 Connector
-
-
- Send value of a PIM reference
- Loop values for CS PIM references
- Send value of a Channel (view) reference
- Loop values for CS Channel (Views) references
- Send value of a MAM reference
- Loop values for CS MAM references
- Send value of an attribute reference
- Send value of a user reference
- Loop values for user references
- Send value of a reference (deprecated)
- Merge reference values format plugin
- Search for usage of item
- Search for item IDs using attribute data
-
- Loop Head and Loop Value
- Loop values for several attributes simultaneously
- Loop values for child elements
- Loop values for CS PIM references
- Loop values for CS Channel (Views) references
- Loop values for CS MAM references
- Loop values for user references
- Loop values for SC::Prices
- Loop values for SC::Stocktable entries
- Loop values for SC::Complex products
- Loop values for a CS table
- Loop values for CS type reference
- Loop value for simple data record
- Loop values for JSON Objects
- Loop for value range entries
-
- Create a JSON-String (create an array)
- Format value lists
- Tree paths or values from tree elements
- Multistep formatting
- Send accesslevel of the object
- Send value of a job parameter
- Search for values in several attributes
- Format with PHP Code (deprecated)
- Format Macros
- Load data via REST Service
- AI Value Transformation Format
- AI Value Translation Format
- Store value into a Contentserv Item
- Execute a conditional format (switch-case) Format Plugin
- Load array value from the Contentserv getValues Format Plugin
- Process HTML table Format Plugin
- Replace via regex pattern format plugin
- Convert value ranges into each other
- Merge Array Format Plugin
- Export several attributes simultaneously
- Show all articles ( 5 ) Collapse Articles
-
Other Connectors
AI Value Translation Format
(Since version 1.19)
As a Large Language Model the Ursula AI is also capable of translating texts into various languages.
In this article you will learn how to create and navigate the translation formatting to your purposes.
How to create a formatting
1) In your job go to Datamaps.
2) Open Mapping.
![]()
3) Add a formatting by clicking on the + symbol.
4) Now go to Format (the third box from the left) and select ‘Translate via Ursula AI’ in the drop-down menu.
![]()
5) By clicking on ‘Edit format’ (the cogwheel symbol) you will enter the Settings window
![]()
Settings
![]()
Formatting
Shows the formatting you are currently working on. This can not be changed in the Settings window.
Status
The process condition of the formatting. For example, if it is approved, a work-in-progress or denied.
Name
The title of the formatting. This setting is only recommended if you are planning to link to this format via the format ‘Link on another configuration‘.
> Conditions
Here you can set the conditions to meet before the formatting starts.
You can find out more by clicking on this LINK (Setting conditions).
> Placeholders
Allows you to control the placeholders of the formatting.
Learn more by clicking on this LINK (Working with placeholder conditions).
Format of the source value
Specifies the format how the source value will be transformed before it is given to the AI.
Source language for the translation
Select the language to be translated here. Since the Ursula AI is not able to recognize the language to be translated independently, it must be instructed via this input box.
For example: If your source value is in English, choose English.
Behavior, when and how the translation should be made
![]()
Here you can choose conditions on how and when the texts will be translated. For example, if the Ursula AI should always translate or pay attention to values that have already been inherited.
This of course, also controls how often the AI is prompted, meaning this affects the costs. We only recommend the option `Always translate` for testing purposes and then switching to `Only translate from the source language if the value in the current language is empty`, so that the AI is only prompted when necessary.
Prompt dependent on target languages. You can use the placeholders {Language} = full name of the CS language and {SourceValue} = input value
![]()
Allows you to create specific AI prompts for the translation. For example if texts should be shortened in German—since they tend to be longer in this language.
Important: If you create a prompt (by clicking on the + symbol beneath the table) it will not only overwrite the ‘DEFAULT‘ prompt and also any prompt in the same language that came before. Therefore it is necessary to copy any text from earlier prompts into the latest one to ensure the instructions will still be followed by the AI.
Should results be cached with the same source value and prompt?
Controls whether the AI shall always be prompted anew even if the prompt and the source value is the same.
Please note: You can only choose between ‘yes‘ and ‘no‘. Latter will create more costs. If ‘yes‘ is selected the previous answers will be reused.
Run Example
To fully understand how you can translate values with the Ursula AI it is best demonstrated with a step-by-step case example.
My goal for this example is to translate the German values of the Valdipino Poncho of an language-independent attribute into English, French and Japanese.
1) I create a format by clicking on the + symbol beneath the table.
2) As Attribute I select ‘Description (26)‘.
3) In the Export Column I write ‘productTexts|description|{StoreView}‘
With the pipe I I make sure that the ‘description‘ is sorted into ‘productTexts‘ when exported into an array. With the curly brackets { } I create a placeholder, in my example for language switches.
4) As Format I choose ‘ Translate via Ursula AI‘.
![]()
5) With the basics set I click on the ‘Edit format‘ button (the cogwheel) to open the Settings window.
6) For a Name I choose ‘Translation Format‘.
![]()
7) For Format of the source value I select ‘CS::Formatted value (CS formatted)‘, since it retrieves the good-looking displayed value of an attribute, which is perfect for the AI to work with.
![]()
8) As for the Source language for the translation, I choose German (de(2)) since in my case, the passed value to the format is in German and I am planning to translate it into the other languages.
9) For the Behavior, when and how the translation should be made I allow the Ursula AI to ‘Always translate‘. This means it is translated even if values are existent in the target language.
![]()
10) For the language dependent prompt I create an own by clicking on the + symbol below the table.
![]()
11) For the language I select English (en). Then I copy the prompt from the ‘DEFAULT‘ into my new prompt and add the new instruction that the Ursula AI may not use the words ‘seamless‘ and ‘robust‘.
Since I only specified an extra prompt for English, all other languages will take their prompt out of the `DEFAULT` case. Hence, it is acting as the master case.
12) When asked if the results should be cached with the same source value and prompt, I choose ‘yes‘ .
![]()
12) Afterwards I save my progress by clicking on the floppy disc button. Or just by pressing ALT + S.
![]()
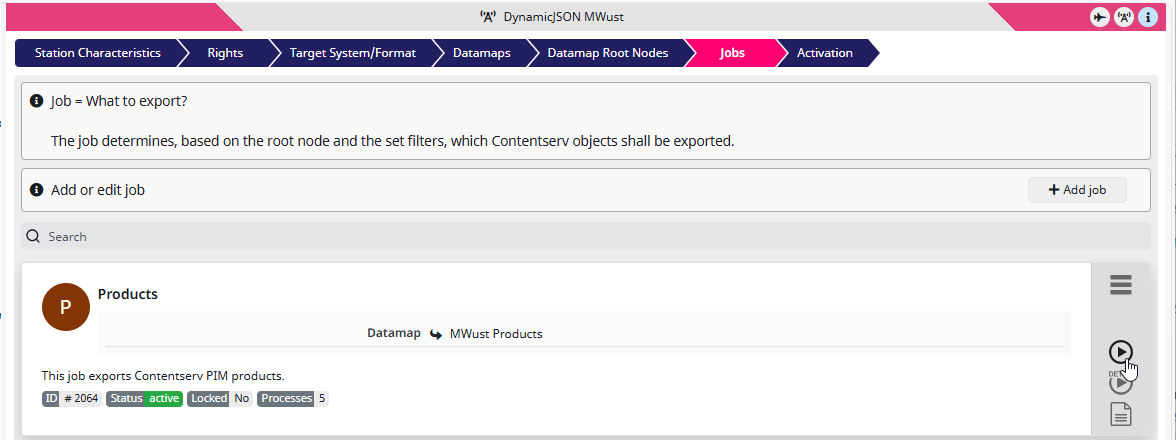
13) For the next step I go to Jobs then to Data Source in the sub-menu, where I choose the ‘Valdipino poncho (111850)‘ as Root Node.
![]()
14) As Action I activate ‘Products‘ (i.e. pushing it from Available to Selected) by double-clicking on it.
![]()
15) For the final step I order the SAWSConnector Suite to ‘Run Job in normal mode‘.
Although it is recommended to let it run on the Job Pilot first. This is a safe test environment where there can be no damage done to existing data or files.
This is the result:
![]()
Warning & Disclaimer
AI-generated texts and content may be inaccurate, incorrect or misleading.
It is therefore recommended that you read, review, and edit them yourself after creation.
Although translation tools have advanced considerably in the last few years, they are still prone to errors.
It is ALWAYS advisable to let a native speaker proof-read the translated texts.