-
General
-
Releases
-
Base Connector
-
- Beginner's Guide
- Overview
- Stations
- Datamaps
- Importing templates
- Setting conditions
- Job filter function
- How to create backups
- Running and Monitoring Jobs
- Export Job Automation
- Import/Export & copy of data map rows
- Synchronizing references that are not contained in views
- Get the preconfigured "Source data set - Template"
- Configuring categories and products
- Channel/View Tree Maintenance Active Job
- Configuring the price & stock modules
- Configuring the price/stock value ranges
- Configuring volume discounts/scale prices
- How to export prices
- How to export stock values from certain storage units
- Use of Contentserv Credentials
- Connector & Station User Limitation
- Formats
- SC::Dynamic Image Crop Preset
- Placeholders
- Show all articles ( 10 ) Collapse Articles
-
- Price Table
- Stock Table
- Sales Channel Table
- Complex Article Table
- Importing data into SAWS tables (price, stock, etc.)
- SAWSConnector Usages
- Variant Articles
- Assignment of articles to complex articles
- Searching for SC::Prices / SC::Stocks
- Searching for SC::Channels
- Setup a transformation list for CSTypes
- Context-Sensitive Product Value Export
-
- Working with placeholder in conditions
- Improve usability of SC::Tables
- Placeholder for SC::Price, SC::Channel, SC::Stock
- REST Service API for SAWS Tables (Prices, Stock, Channels & Complex Articles)
- Dataflow import of SC::Tables
- Dataflow export of SC::Tables
- The datamap summary - Creating an automated documentation
- Export images as a ZIP file
- Image export with direct access to the CONTENTSERV platform
- Image export with no access to the CONTENTSERV platform
- Image export from a third party system
- How to configure CS Dashboard
- Setup a transformation list for CSTypes
- FAQ
- Export Smart Document via Active Script and assign output to product
- Format Macros
- Controlling Connector Jobs via the REST API
- Sales Channel Maintenance via Excel Cross-Reference
- Sales Channel Inheritance Active Job
- Job Parameters & Context Parameters
- Logbook
- Fill complex article tables automatically
- Show all articles ( 7 ) Collapse Articles
-
-
- Send value of a PIM reference
- Loop values for CS PIM references
- Send value of a MAM reference
- Loop values for CS MAM references
- Send value of a Channel (view) reference
- Loop values for CS Channel (Views) references
- Send value of an attribute reference
- Send value of a user reference
- Loop values for user references
- Send value of a reference (deprecated)
-
- Loop values for several attributes simultaneously
- Loop values for child elements
- Loop values for CS PIM references
- Loop values for CS Channel (Views) references
- Loop values for CS MAM references
- Loop values for user references
- Loop values for SC::Prices
- Loop values for SC::Stocktable entries
- Loop values for SC::Complex products
- Loop values for CS type reference
- Loop values for a CS table
- Loop value for simple data record
- Loop values for JSON Objects
-
- Create a JSON-String (create an array)
- Format value lists
- Tree paths or values from tree elements
- Multistep formatting
- Send accesslevel of the object
- Send value of a job parameter
- Search for values in several attributes
- Format with PHP Code (deprecated)
- Format Macros
- Load data via REST Service
- AI Value Transformation Format
- AI Value Translation Format
- Store value into a Contentserv Item
- Execute a conditional format (switch-case) Format Plugin
- Load array value from the Contentserv getValues Format Plugin
- Process HTML table Format Plugin
- Show all articles ( 1 ) Collapse Articles
-
Owl Cloud Services
-
Owl Data Hub
-
Ursula AI
- Ursula AI
- Supported AIs
- AI Value Transformation Format
- AI Value Translation Format
- Generate Descriptions with Ursula AI Active Job
- Populate Attributes via Ursula AI Active Job
- AI Product Tree Organizer Active Job
- Mapping Sales Channels via the Ursula AI Active Job
- Store value into a Contentserv Item
-
GenericJSON / DynamicJSON Connector
-
-
- Send value of a PIM reference
- Loop values for CS PIM references
- Send value of a Channel (view) reference
- Loop values for CS Channel (Views) references
- Send value of a MAM reference
- Loop values for CS MAM references
- Send value of an attribute reference
- Send value of a user reference
- Loop values for user references
- Send value of a reference (deprecated)
-
- Loop values for several attributes simultaneously
- Loop values for child elements
- Loop values for CS PIM references
- Loop values for CS Channel (Views) references
- Loop values for CS MAM references
- Loop values for user references
- Loop values for SC::Prices
- Loop values for SC::Stocktable entries
- Loop values for SC::Complex products
- Loop values for a CS table
- Loop values for CS type reference
- Loop value for simple data record
- Loop values for JSON Objects
-
- Create a JSON-String (create an array)
- Format value lists
- Tree paths or values from tree elements
- Multistep formatting
- Send accesslevel of the object
- Send value of a job parameter
- Search for values in several attributes
- Format with PHP Code (deprecated)
- Format Macros
- Load data via REST Service
- AI Value Transformation Format
- AI Value Translation Format
- Store value into a Contentserv Item
- Execute a conditional format (switch-case) Format Plugin
- Load array value from the Contentserv getValues Format Plugin
- Process HTML table Format Plugin
- Show all articles ( 1 ) Collapse Articles
-
GenericXML Connector
-
-
- Send value of a PIM reference
- Loop values for CS PIM references
- Send value of a Channel (view) reference
- Loop values for CS Channel (Views) references
- Send value of a MAM reference
- Loop values for CS MAM references
- Send value of an attribute reference
- Send value of a user reference
- Loop values for user references
- Send value of a reference (deprecated)
-
- Loop values for several attributes simultaneously
- Loop values for child elements
- Loop values for CS PIM references
- Loop values for CS Channel (Views) references
- Loop values for CS MAM references
- Loop values for user references
- Loop values for SC::Prices
- Loop values for SC::Stocktable entries
- Loop values for SC::Complex products
- Loop values for a CS table
- Loop values for CS type reference
- Loop value for simple data record
- Loop values for JSON Objects
-
- Create a JSON-String (create an array)
- Format value lists
- Tree paths or values from tree elements
- Multistep formatting
- Send accesslevel of the object
- Send value of a job parameter
- Search for values in several attributes
- Format with PHP Code (deprecated)
- Format Macros
- Load data via REST Service
- AI Value Transformation Format
- AI Value Translation Format
- Store value into a Contentserv Item
- Execute a conditional format (switch-case) Format Plugin
- Load array value from the Contentserv getValues Format Plugin
- Process HTML table Format Plugin
- Show all articles ( 1 ) Collapse Articles
-
SimpleExcel Connector
-
-
- Send value of a PIM reference
- Loop values for CS PIM references
- Send value of a Channel (view) reference
- Loop values for CS Channel (Views) references
- Send value of a MAM reference
- Loop values for CS MAM references
- Send value of an attribute reference
- Send value of a user reference
- Loop values for user references
- Send value of a reference (deprecated)
-
- Loop values for several attributes simultaneously
- Loop values for child elements
- Loop values for CS PIM references
- Loop values for CS Channel (Views) references
- Loop values for CS MAM references
- Loop values for user references
- Loop values for SC::Prices
- Loop values for SC::Stocktable entries
- Loop values for SC::Complex products
- Loop values for a CS table
- Loop values for CS type reference
- Loop value for simple data record
- Loop values for JSON Objects
-
- Create a JSON-String (create an array)
- Format value lists
- Tree paths or values from tree elements
- Multistep formatting
- Send accesslevel of the object
- Send value of a job parameter
- Search for values in several attributes
- Format with PHP Code (deprecated)
- Format Macros
- Load data via REST Service
- AI Value Transformation Format
- AI Value Translation Format
- Store value into a Contentserv Item
- Execute a conditional format (switch-case) Format Plugin
- Load array value from the Contentserv getValues Format Plugin
- Process HTML table Format Plugin
- Show all articles ( 1 ) Collapse Articles
-
Magento Connector
-
-
- Send value of a PIM reference
- Loop values for CS PIM references
- Send value of a Channel (view) reference
- Loop values for CS Channel (Views) references
- Send value of a MAM reference
- Loop values for CS MAM references
- Send value of an attribute reference
- Send value of a user reference
- Loop values for user references
- Send value of a reference (deprecated)
-
- Loop values for several attributes simultaneously
- Loop values for child elements
- Loop values for CS PIM references
- Loop values for CS Channel (Views) references
- Loop values for CS MAM references
- Loop values for user references
- Loop values for SC::Prices
- Loop values for SC::Stocktable entries
- Loop values for SC::Complex products
- Loop values for a CS table
- Loop values for CS type reference
- Loop value for simple data record
- Loop values for JSON Objects
-
- Create a JSON-String (create an array)
- Format value lists
- Tree paths or values from tree elements
- Multistep formatting
- Send accesslevel of the object
- Send value of a job parameter
- Search for values in several attributes
- Format with PHP Code (deprecated)
- Format Macros
- Load data via REST Service
- AI Value Transformation Format
- AI Value Translation Format
- Store value into a Contentserv Item
- Execute a conditional format (switch-case) Format Plugin
- Load array value from the Contentserv getValues Format Plugin
- Process HTML table Format Plugin
- Show all articles ( 1 ) Collapse Articles
-
Shopware 5 Connector
-
- Configuration Shopware
- Configuration PIM
- Shopware attribute setting
- Configuration SAWSConnector
- Station configuration
- Source data set configuration
- Configuring categories and products
- Price table configuration for Shopware
- Result in Shopware
- Subshops and the SAWSConnector Shopware
- ean
- Custom Fields (attribute)
- highlight
- purchaseSteps
- stockMin
- supplierNumber
- notification
- shippingFree
- length
- height
- width
- weight
- shippingTime
- metaKeywords
- Show all articles ( 9 ) Collapse Articles
-
-
- Send value of a PIM reference
- Loop values for CS PIM references
- Send value of a Channel (view) reference
- Loop values for CS Channel (Views) references
- Send value of a MAM reference
- Loop values for CS MAM references
- Send value of an attribute reference
- Send value of a user reference
- Loop values for user references
- Send value of a reference (deprecated)
-
- Loop values for several attributes simultaneously
- Loop values for child elements
- Loop values for CS PIM references
- Loop values for CS Channel (Views) references
- Loop values for CS MAM references
- Loop values for user references
- Loop values for SC::Prices
- Loop values for SC::Stocktable entries
- Loop values for SC::Complex products
- Loop values for a CS table
- Loop values for CS type reference
- Loop value for simple data record
- Loop values for JSON Objects
-
- Create a JSON-String (create an array)
- Format value lists
- Tree paths or values from tree elements
- Multistep formatting
- Send accesslevel of the object
- Send value of a job parameter
- Search for values in several attributes
- Format with PHP Code (deprecated)
- Format Macros
- Load data via REST Service
- AI Value Transformation Format
- AI Value Translation Format
- Store value into a Contentserv Item
- Execute a conditional format (switch-case) Format Plugin
- Load array value from the Contentserv getValues Format Plugin
- Process HTML table Format Plugin
- Show all articles ( 1 ) Collapse Articles
-
Shopware 6 Connector
-
- Tutorial Video
- First steps
- Import Shopware settings
- Export categories
- Export media files
- Export simple products
- Export multiple languages
- Export variant products
- Export product properties
- Export custom fields
- Export product cross-selling relationships
- Export prices
- Export stocks
- Export into any other Shopware field
- How to address multiple Shopware 6 websites
- How to address different Shopware 6 Sale-Channels from one Contentserv System
- Useful Links
- Sales Channel Maintenance via Excel Cross-Reference
- Show all articles ( 3 ) Collapse Articles
-
-
- Send value of a PIM reference
- Loop values for CS PIM references
- Send value of a MAM reference
- Loop values for CS MAM references
- Send value of a Channel (view) reference
- Loop values for CS Channel (Views) references
- Send value of an attribute reference
- Send value of a user reference
- Loop values for user references
- Send value of a reference (deprecated)
-
- Loop values for several attributes simultaneously
- Loop values for child elements
- Loop values for CS PIM references
- Loop values for CS Channel (Views) references
- Loop values for CS MAM references
- Loop values for user references
- Loop values for SC::Prices
- Loop values for SC::Stocktable entries
- Loop values for SC::Complex products
- Loop values for a CS table
- Loop values for CS type reference
- Loop value for simple data record
- Loop values for JSON Objects
-
- Create a JSON-String (create an array)
- Format value lists
- Tree paths or values from tree elements
- Multistep formatting
- Send accesslevel of the object
- Send value of a job parameter
- Search for values in several attributes
- Format with PHP Code (deprecated)
- Format Macros
- Load data via REST Service
- AI Value Transformation Format
- AI Value Translation Format
- Store value into a Contentserv Item
- Execute a conditional format (switch-case) Format Plugin
- Load array value from the Contentserv getValues Format Plugin
- Process HTML table Format Plugin
- Show all articles ( 1 ) Collapse Articles
-
OXID Connector
-
-
- Send value of a PIM reference
- Loop values for CS PIM references
- Send value of a MAM reference
- Loop values for CS MAM references
- Send value of a Channel (view) reference
- Loop values for CS Channel (Views) references
- Send value of an attribute reference
- Send value of a user reference
- Loop values for user references
- Send value of a reference (deprecated)
-
- Loop values for several attributes simultaneously
- Loop values for child elements
- Loop values for CS PIM references
- Loop values for CS Channel (Views) references
- Loop values for CS MAM references
- Loop values for user references
- Loop values for SC::Prices
- Loop values for SC::Stocktable entries
- Loop values for SC::Complex products
- Loop values for a CS table
- Loop values for CS type reference
- Loop value for simple data record
- Loop values for JSON Objects
-
- Create a JSON-String (create an array)
- Format value lists
- Tree paths or values from tree elements
- Multistep formatting
- Send accesslevel of the object
- Send value of a job parameter
- Search for values in several attributes
- Format with PHP Code (deprecated)
- Format Macros
- Load data via REST Service
- AI Value Transformation Format
- AI Value Translation Format
- Store value into a Contentserv Item
- Execute a conditional format (switch-case) Format Plugin
- Load array value from the Contentserv getValues Format Plugin
- Process HTML table Format Plugin
- Show all articles ( 1 ) Collapse Articles
-
Typo3 Connector
-
-
- Send value of a PIM reference
- Loop values for CS PIM references
- Send value of a Channel (view) reference
- Loop values for CS Channel (Views) references
- Send value of a MAM reference
- Loop values for CS MAM references
- Send value of an attribute reference
- Send value of a user reference
- Loop values for user references
- Send value of a reference (deprecated)
-
- Loop values for several attributes simultaneously
- Loop values for child elements
- Loop values for CS PIM references
- Loop values for CS Channel (Views) references
- Loop values for CS MAM references
- Loop values for user references
- Loop values for SC::Prices
- Loop values for SC::Stocktable entries
- Loop values for SC::Complex products
- Loop values for a CS table
- Loop values for CS type reference
- Loop value for simple data record
- Loop values for JSON Objects
-
- Create a JSON-String (create an array)
- Format value lists
- Tree paths or values from tree elements
- Multistep formatting
- Send accesslevel of the object
- Send value of a job parameter
- Search for values in several attributes
- Format with PHP Code (deprecated)
- Format Macros
- Load data via REST Service
- AI Value Transformation Format
- AI Value Translation Format
- Store value into a Contentserv Item
- Execute a conditional format (switch-case) Format Plugin
- Load array value from the Contentserv getValues Format Plugin
- Process HTML table Format Plugin
- Show all articles ( 1 ) Collapse Articles
-
Other Connectors
Stations
To start our first export, we need to create and configure a station.
Concept
A station represents a destination for our data. Just like a train station, our connector station can accept different kinds of payloads, which we will configure later. Each shop-system or custom system URL (e.g. for JSON or XML) will need it’s own station. The station configuration will contain information about where to send the data. It will also contain information such as authentication credentials.
Creating Your First Station
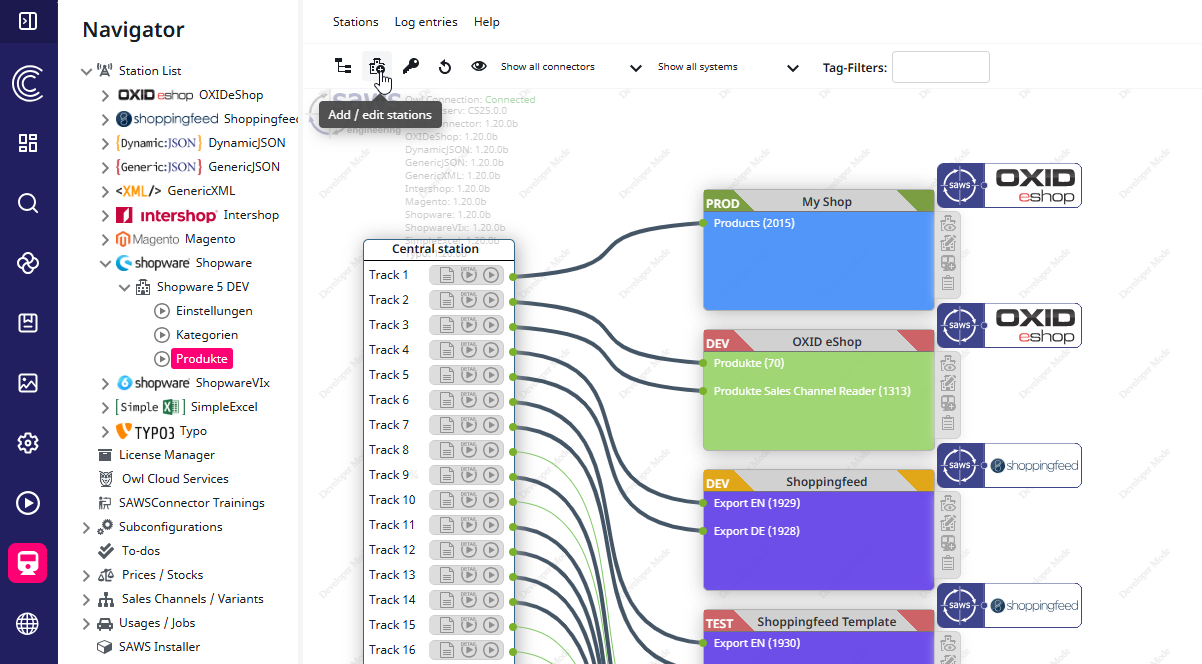
Go ahead and create a new station. Click this button to open the connector and station management.
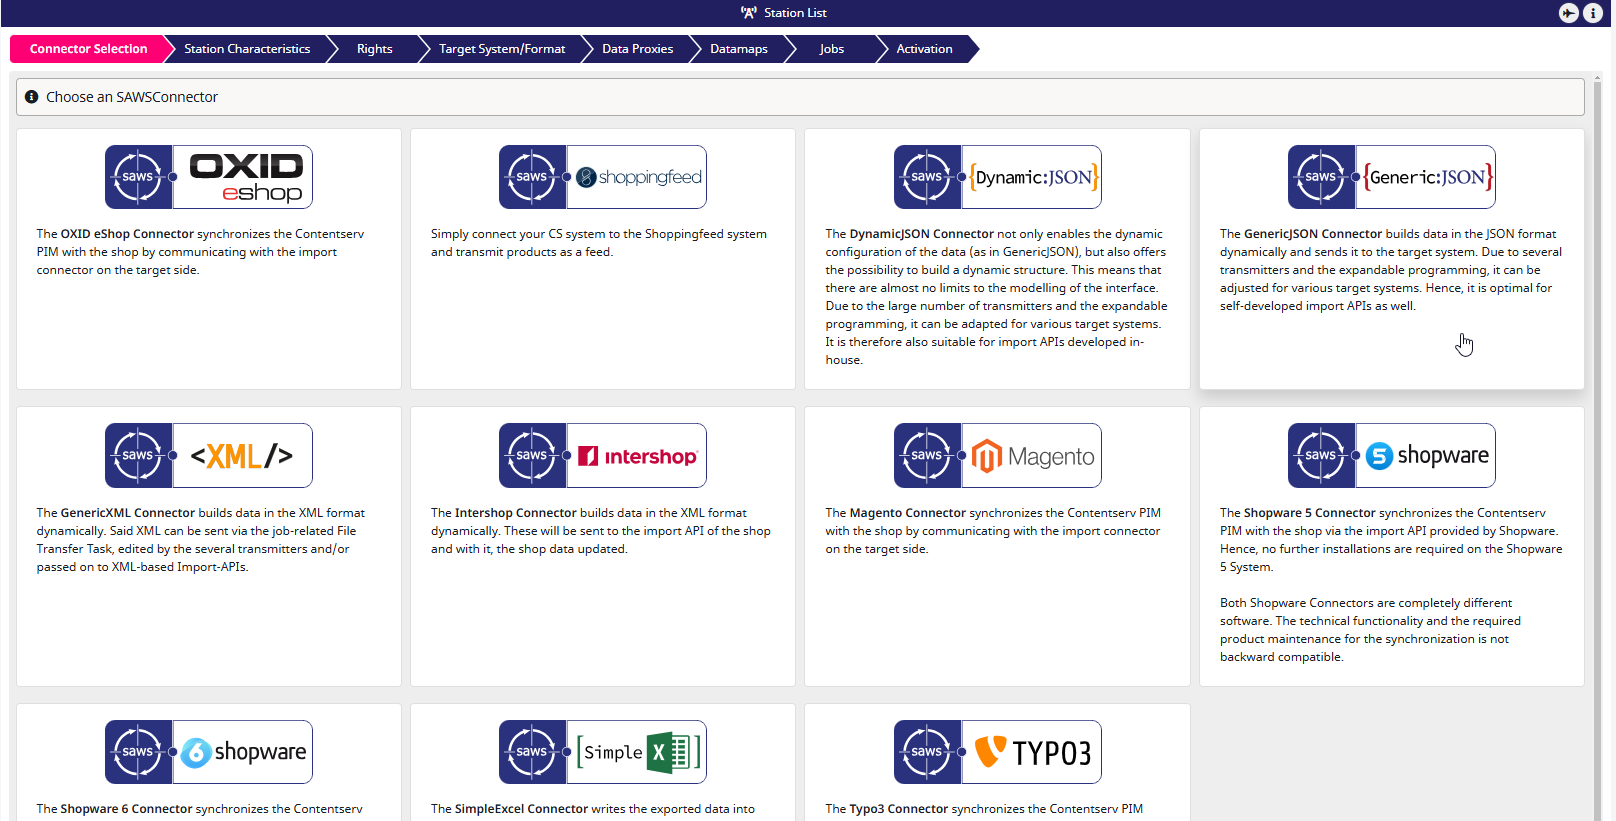
Select your desired connector. In this instance, the GenericJSON Connector is selected. The configuration structure is the same for every connector.
You can create a new station from scratch or select a predefined template. Our team offers station templates with various sub-configurations for each connector. Keep in mind that these templates serve as a starting point and may differ significantly from your specific requirements. For this tutorial, we will continue with a blank station.
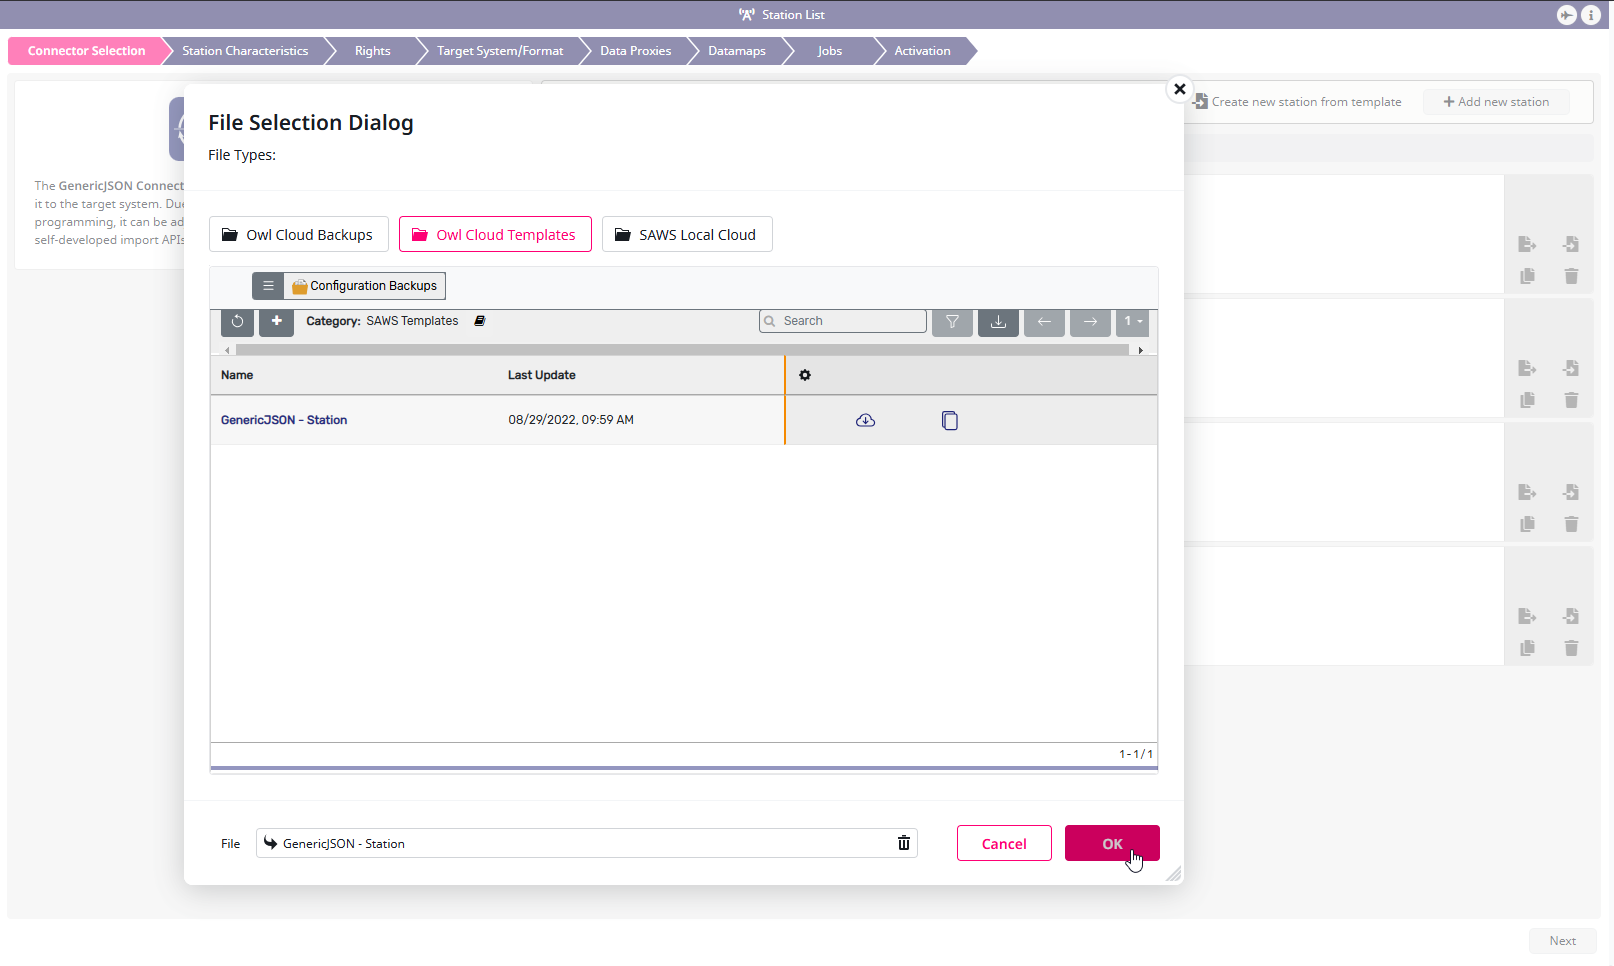
Selecting your newly created station will forward you to the first step in the station wizard.

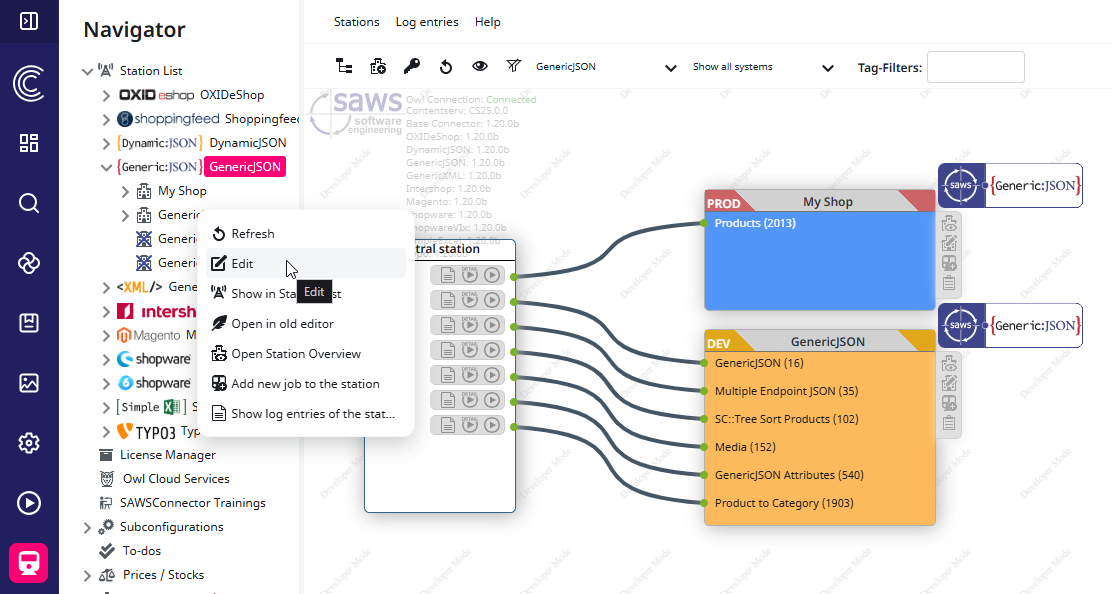
Your station will also appear now in the navigator. You can also access the station wizard at any point in time later by using the right-click context.
The first step of the wizard has the following editor fields.
| Field Name | Field Description |
|---|---|
| Name | Here you can name your new station. We recommend choosing descriptive names for all your configurations, so you can remember which configuration does what. |
| Application Instance | You can use this option to specify what this station will be used for (Development/Testing/Production). This does not change any behavior, but can be used in the filter. |
| Station Image | |
| Color | You can use different colors to visually group stations. |
| Description |
You now created a station. The main components of a station are the data maps and jobs.
A station determines where the data is exported to.
A data map determines how the data is transformed before the transmission or file creation.
A job determines what Contentserv objects are exported.
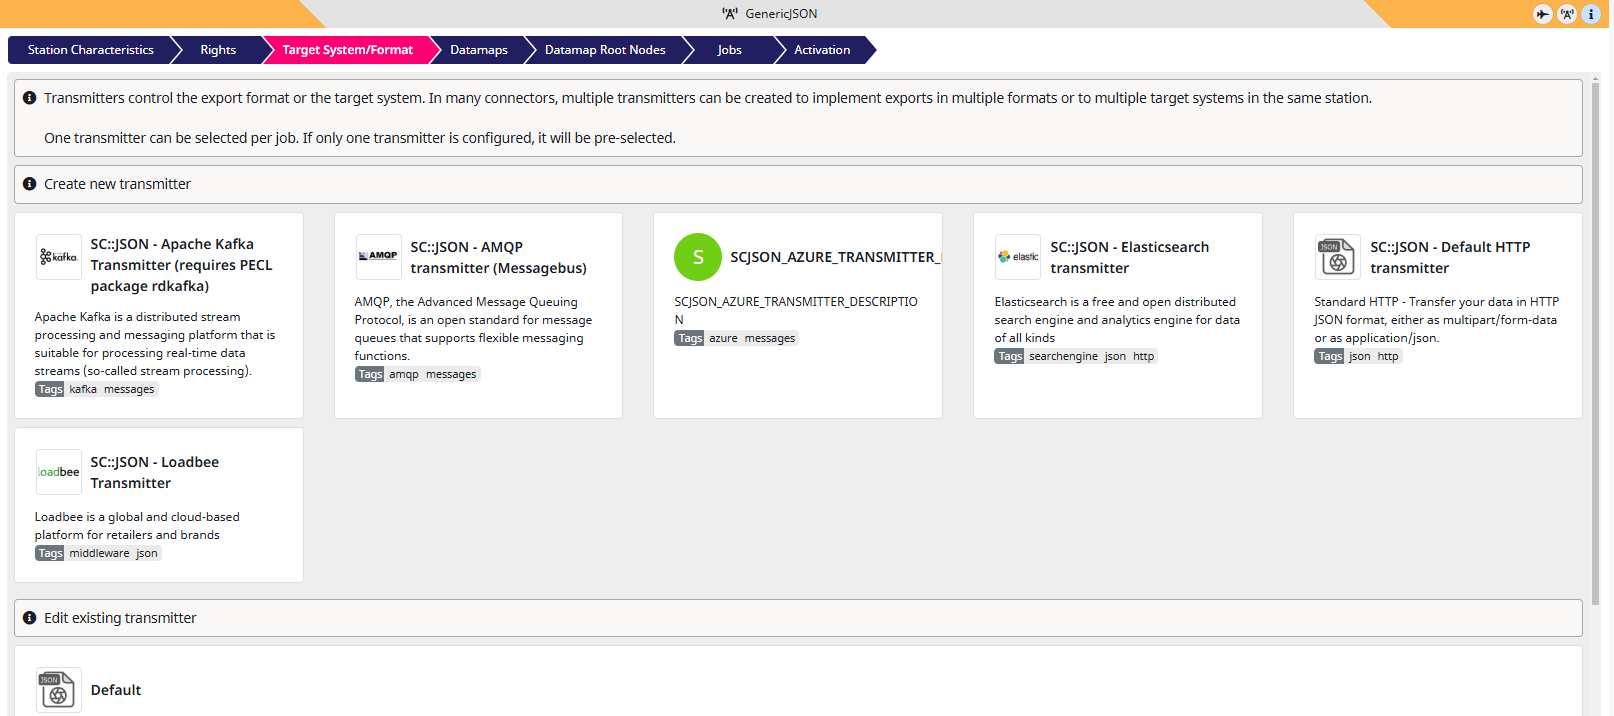
The configuration wizard will now lead you step-by-step through the configuration. Every step displays a hint text at the top to provide you the context of your configuration.
Follow the wizard until you reach the finish to build your export. Feel free to use the following tutorials on this page or search for configuration components in the search bar to learn more about each of them.
